¶ General Setup
Setup => General
Enter the setup of the Authorization Box environment like Customer settings, Contracts, Database connections and Authorization Box users.
A video on how to use the Backup export and import options can be found on our YouTube channel.
¶ Customer Settings
Use the ‘Edit’ button (left top corner) to change the Customer Settings.
.png)
Contact name : Name of the company's contact.
Contact Email Address : Email Address of the company's contact.
Contact Phone Number : Phone Number of the company's contact. (optional)
Company required in Authorization Requests : When set to “Yes”, the system will check on Company in the Authorization Request.
Authentication Method : This option will be removed from the settings as we transitioned to the new authentication method.
Multi-Factor Authentication : This option will be removed from the settings as we transitioned to the new authentication method. When the company's policy is to use MFA, this will automatically be enabled, when already using Entra. In case of a non-Entra environment, a mail will be sent with a verification code.
¶ Fasttab Contracts
Shows the contract(s) with 2-Controlware. The number following “Contracts” shows the number of active contracts.
.png)
Application Name : The application a contract has been agreed upon.
Start date : The starting date of the application contract.
End date : The date the application contract will end.
Extension Date : The date the application contract will have to be extended.
Contract terminated : When a contract is terminated, this column will state ‘Contract terminated’.
Characteristic : Any additional information regarding the application contract.
¶ Fasttab Databases
Shows the number of database connections that are allowed to be set up with the Authorization Box as per contract and how many have already been assigned.
In the below image, the customer has a contract for 21 database connections and has 14 database connections already set up.
.png)
How to create a (new) database.
If the number of database connections exceeds 10, pagination is used for a better overview of the connections.

¶ Overwrite current permissions in Business Central with those of the Authorization Box
All current permissions in Business Central can be overwritten with the ones in the Authorization Box.
Activating this option, means that only the permissions assigned to a user with an Organization role in the Authorization Box, will be valid for the Authorization Box activated users.
Any permissions assigned directly in Business Central will be removed in Business Central, if they are not present in an organization role assigned to that user.
Open a Database(connection) and check the box "Default overwrite Current Permissions"
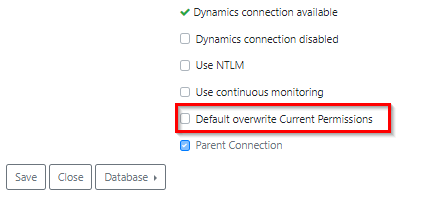
When saving, a prompt appears if this has to be executed for all users (activated in the Authorization Box).
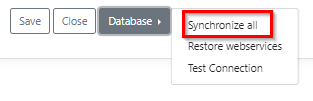
When ‘Yes’ was chosen to be executed for all users, and this task is completed, use “Synchronize all” in this connection (in the drop down menu of the button 'Database') to remove all permission sets which were directly assigned to any users activated in the Authorization Box.
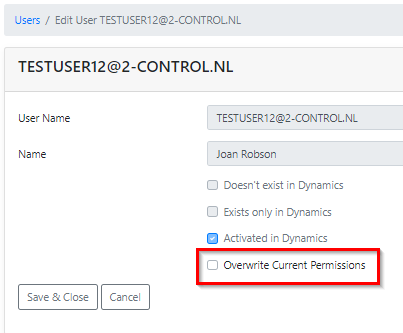
It is possible to single out a user(s). On the overview of the users, the pencil icon has to be clicked to edit that user,
where the checkbox kan be marked/unmarked to set that option to be active/inactive.
¶ Fasttab Users
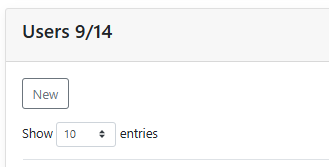
Shows the number of Users that will be allowed to log on into the Authorization Box as per contract and how many have already been assigned.
In the below image, the contract allows 14 Authorization Box users and 9 have already been assigned.
Changing the settings of the current User.
Adding users to the Authorization Box.
Adding users to the Authorization Box
There is a video on our YouTube channel on how to set up User access.
Add a number of users that will be allowed to log into the Authorization Box as per contract.
Go to Setup => General and click on the fasttab “Users”.
Click on ‘New’ to set up a new user.
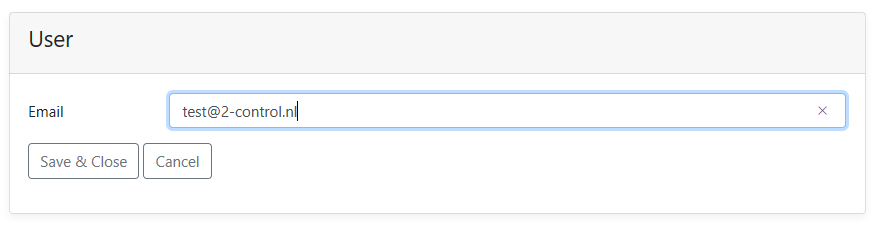
Enter the user’s Email address.
'Save & Close' : Saves the user and expands the page for more details.
'Cancel' : Cancels adding a user and closes the page.
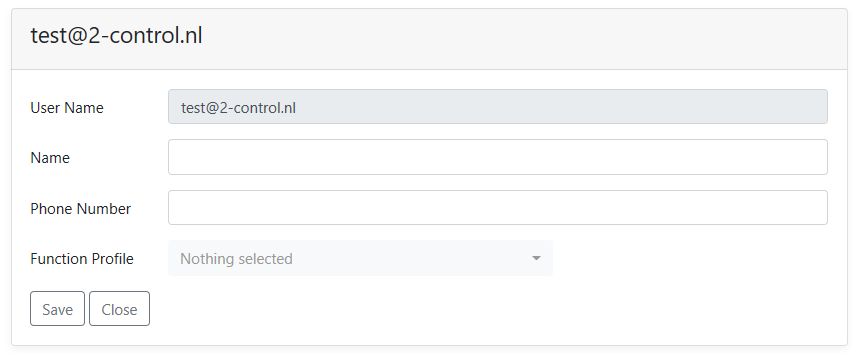
After saving, enter the user details:
- Name : Enter the user's Name.
- Phone Number : (optional) Enter the User's Phone Number.
- Function Profile : Select the User Profile. (mandatory to grant access to functionality of the Authorization Box)
The Function Profile ‘Application Manager’ has no restrictions on rights.
By choosing the correct Function Profile, a person will be granted specific rights in the Authorization Box.
The most common Profiles used are :
- The Application Manager (has no restriction on rights)
- The Controller
- The Framework Manager
- The Power User (has most rights except General Management)
- The Support Employee
- The Support Employee Light (mostly View rights)
- The API User (when access to the API is required)
When a Function Profile has been assigned to an Authorization Box user, the fasttab ‘Roles’ on the usercard will show a check mark for the assigned permissions.
To grant the User access to the available connection(s) (if not already ‘opened’ the User, open the usercard by clicking on that User), click on ‘Select’ in the fasttab ‘Databases’ on the usercard and choose the databases this User should have access to.
A checkmark will show the selected connections. To deselect access to a connection, click on the check marked selection to remove it.
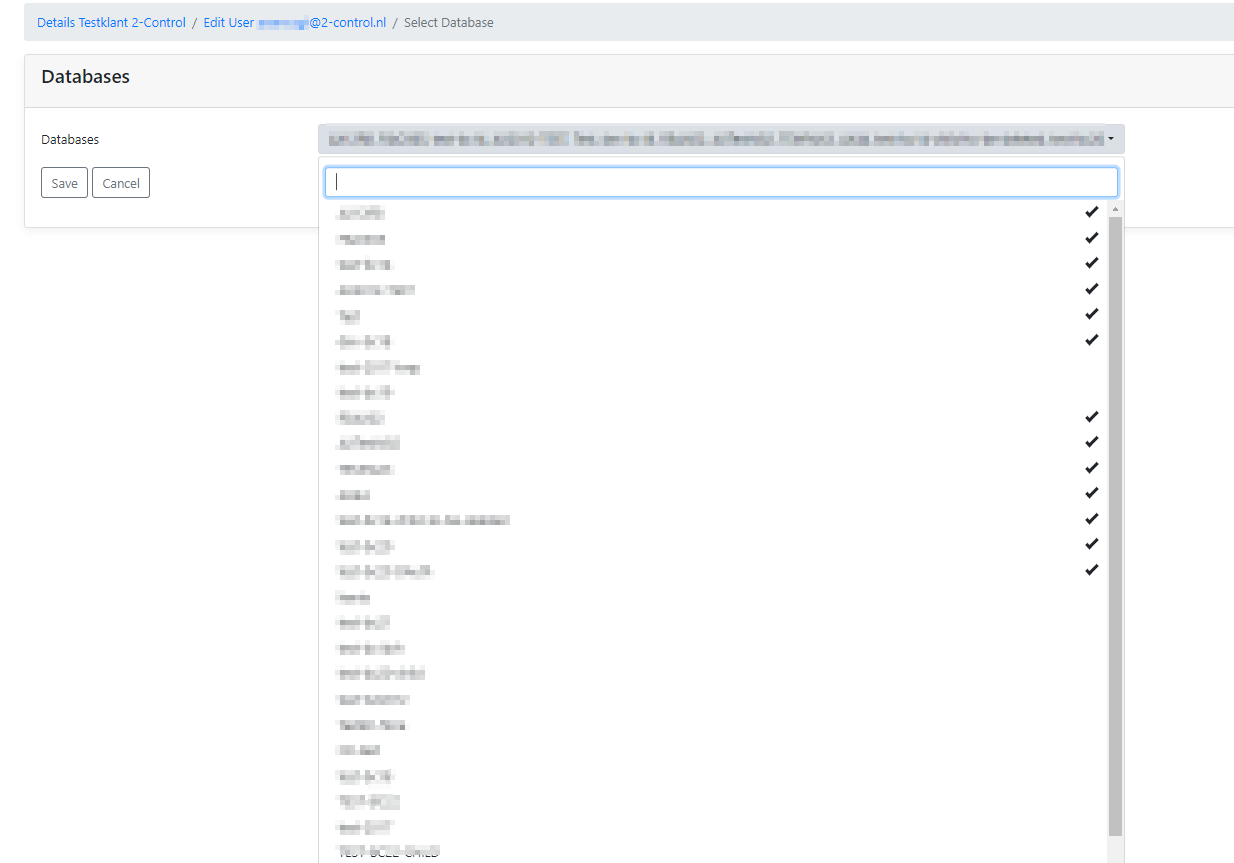
It is possible to grant the user access to all at once by clicking on 'Select All' or to deny access to already assigned connections at once by clicking on 'Deselect All'.
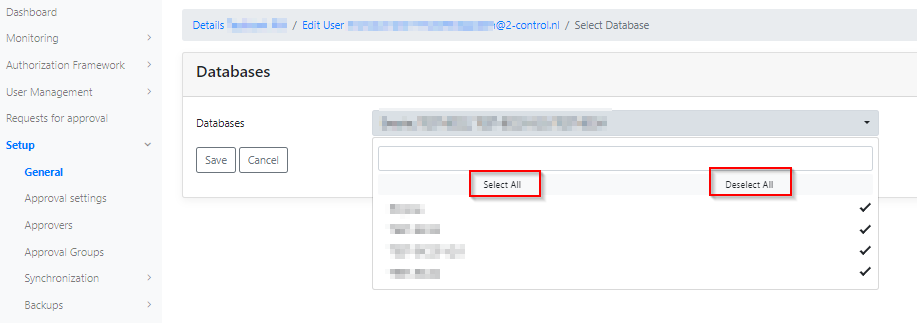
‘Save’ : Saves assigning / changing access to connections for that user.
'Cancel' : Cancels assigning / changing access to connections for that user.
The new User can now log in using the same username and password which is used to log in to Windows, or use the ‘Microsoft Login’ button.
The company's access policy will be in effect. (in regards to MFA etc.)
¶ Roles based on Function Profile
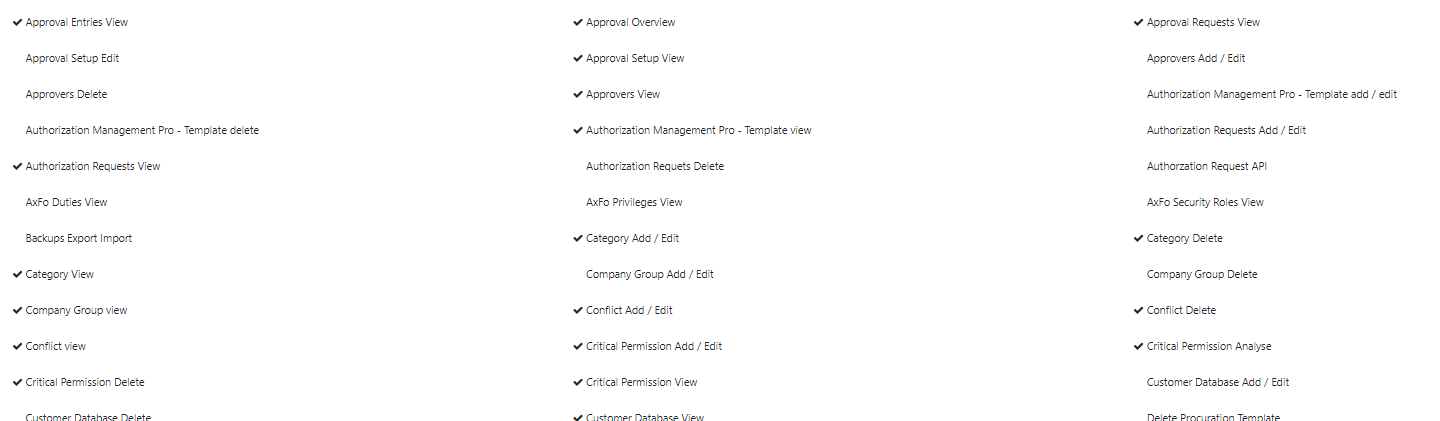
A Function Profile has to be assigned to an Authorization Box User, to have access to the functionality of the Authorization Box.
A Function Profile has certain roles/permissions assigned.
In the fasttab "Roles" the assigned roles/permissions have a checkmark.
.png)
¶ Sign in with Entra (activated globally on May 6th 2026)
Authorization Box makes use of Microsoft Entra for the login process. Log in to the Authorization Box with the organization’s Microsoft Entra account or with a non-Entra account.
When login with the standard URL doesn't work, the alternative URL can be used. ( https://login.2-controlware.com/account/signupsignin )
¶ With a Microsoft Entra account
When using a Microsoft Entra account and logging in for the first time, a confirmation is required to allow 2-Controlware to use this Microsoft Entra account for the login process.
The login process itself works with the company’s policies, so use of the Microsoft Authenticator to approve the sign-in request might be required.
1. Enter the email address of the Microsoft Entra account and click next.
.png)
2. Enter the password and click Sign in.
.png)
3. When an Authorization Box user logs in for the first time, a request to grant permission will pop up. Click on ‘Accept’ to grant the 2-Controlware Microsoft Entra environment to use the company’s Microsoft Entra account for the login process.
We only use the email address and the display name of this Entra account and the only activity we monitor, are the login and logout actions.
.png)
4. The company’s policies might require the use of the Microsoft Authenticator to approve the login request.
.png)
Also, when using only the ‘Login with Microsoft’ button, the company's policies will apply.
¶ With Non-Entra account
When using a non-Entra account to log in, an email will be received with a verification code. Enter the code mentioned in that email and click the Sign in button to get access to the Authorization Box.
1. Enter the email address of the non-Entra account and click next.

2. An email with a verification code will be received.
.png)
3. Enter the verification code and click on Sign in.
.png)
¶ Setting up Approval settings (has to be set up per database connection)
How to set up the Approval settings, assign users as an Approver and how to create Approval Groups.
A video can be found on our YouTube channel with an introduction on how to set up Approval settings.
¶ Approval settings
Go to Setup => Approval settings to set up the number of Approvers.
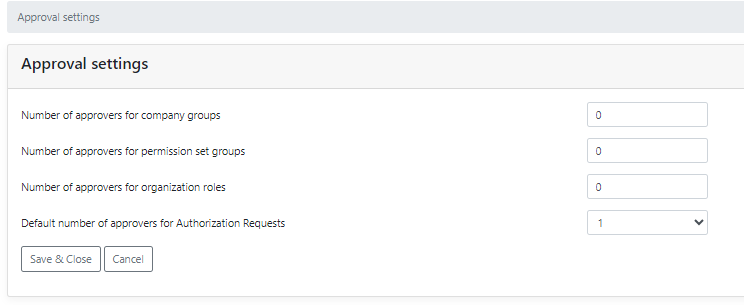
- Number of approvers for Company Groups :
The number of approvers required when a new Company Group has been made or when changes to a Company Group were made.
If the number is set to 0, no approval is required and a new Company Group is made available, or change is processed without approval.
A new Company in a Company Group can result in permissions for users with the same assigned Organization Roles in the other companies in that Group! - Number of approvers for Permission Set Groups :
The number of approvers required when a new Permission Set Group has been made or when changes to a Permission Set Group were made.
If the number is set to 0, no approval is required and a new Permission Set Group has been made, or change is processed without approval.
A new Permission Set in the Permission Set Group can result in extra permissions for users with the same assigned Organization Roles in this linked Permission Set Group! - Number of approvers for Organization Roles:
The number of approvers required when a new Organization Role has been made or when changes to an Organization Role were made.
If the number is set to 0, no approval is required and a new Organization Role has been made, or change is processed without approval.
Should the Organization Role be assigned to an Approval Group, the number of approvers will change according the assigned group. - Default number of approvers for Authorization Requests :
The number of approvers that are required for new Authorization Requests.
If the number is set to 0, no approval is required and changes regarding permission sets assigned to or revoked from a User will be processed without an approval.
'Save & Close' : Saves the assigned number of approvers per category and closes the page.
‘Cancel’ : Cancels the changes made in the number of approvers per category.
¶ Approvers
Setup => Approvers shows an overview of approvers and the assigned Approval Type
To create a new Approver, click on 'New'.
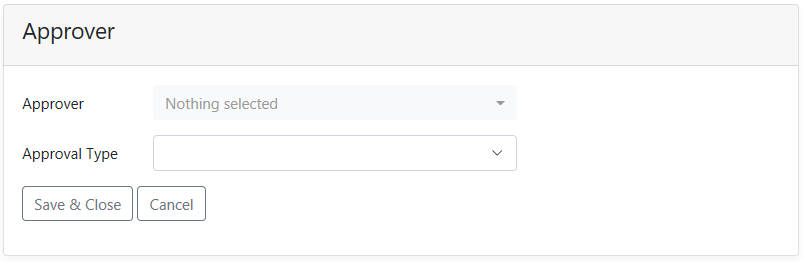
- Approver : Select the Authorization Box user to assign that user as an Approver. Several users can be selected at once. A check mark will appear at their name(s).
- Approval Type : Select the Approval Type. Several types can be selected at once. A check mark will appear at the chosen approval type(s). In case multiple users were selected as an Approver, the selection of Approval Type will be activated for all these users.
Depending on the Approval settings, changes in the framework must be approved.
After approval (when required), the Authorization Box will process the change.
'Save & Close' : Saves the assignment(s) and closes the page.
'Cancel' : Cancels the assignment(s) and closes the page.
In case a User should be revoked a certain Approval Type, click the ‘x’ for that Approval Type line.
.png)
¶ Approval types
The following types of approval are available :
- Assign authorizations : Approve Authorization Requests where assignment of rights are set.
- Revoke authorizations : Approve Authorization Requests where rights are being revoked.
- Create / Change Organization Role : To approve the creation or modification (like the addition of a Permission Set) of an Organization Role.
After approval of the creation / change, the request will be processed.
In case of a change, all the users with the already assigned Organization Role, will automatically be synchronized to process the changes made to that Organization Role. - Create / Change Permission Set Group : To approve the creation or modification of a Permission Set Group.
After approval of the creation / change, the request will be processed.
In case of a change, all the users with the already assigned Permission Set Group, will automatically be synchronized to process the changes made to that Permission Set Group. - Create / Change Company Group : To approve the creation of, or the change to a Company Group.
After approval of the creation / change, the request will be processed.
In case of a change, all the users with the already assigned Company Group, will automatically be synchronized to process the changes made to that Company Group.
¶ Approval Groups
An Approval Groups is a group of one or more Approvers that can be assigned to one or more Organization Roles.
When an Approval Group is assigned to an Organization Role, this will overrule the general Approval Settings for that specific role.
For instance: the number of approvers required for approval on an Authorization Request is generally 1, but an Approval Group is set to 2.
When an organization role has this Approval Group assigned, the number of approvals will be derived of the Approval Group (2) instead of the general settings (1).
¶ Set up an Approval Group
Go to Setup => Approval Groups.
To create a new Approval Group click on 'New'.
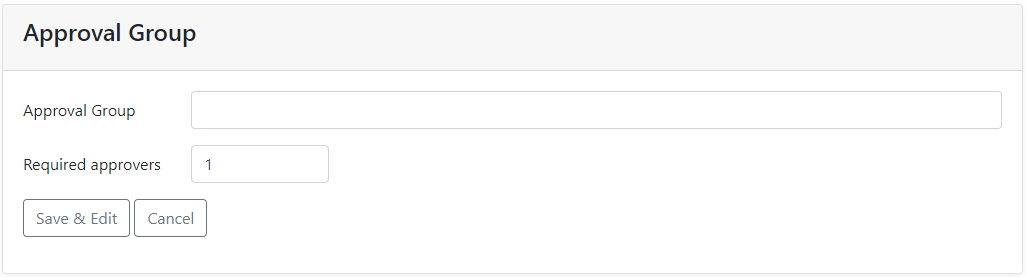
- Approval Group : The name of the Approval Group.
- Required approvers : The number of approvers required for new Approval Requests. This number overrules the number of the general settings and has to be 1 or higher.
‘Save & Edit’ : Saves the Approval Group and expands the page for additional details to be filled in.
'Cancel' : Cancels the addition of the Approval Group and closes the page.
When the Approval Group is saved, Approvers can be added to the Group as well as the Organization Roles to be assigned Group.
¶ Adding Users to an Approval Group
When an Approval Group has been made, one or more Approvers can be added to that Group by moving them from the left to the right column in the fasttab “Users”.
This can be done by double clicking on a user or by selecting a user and clicking on one of the arrow buttons pointing to the right.
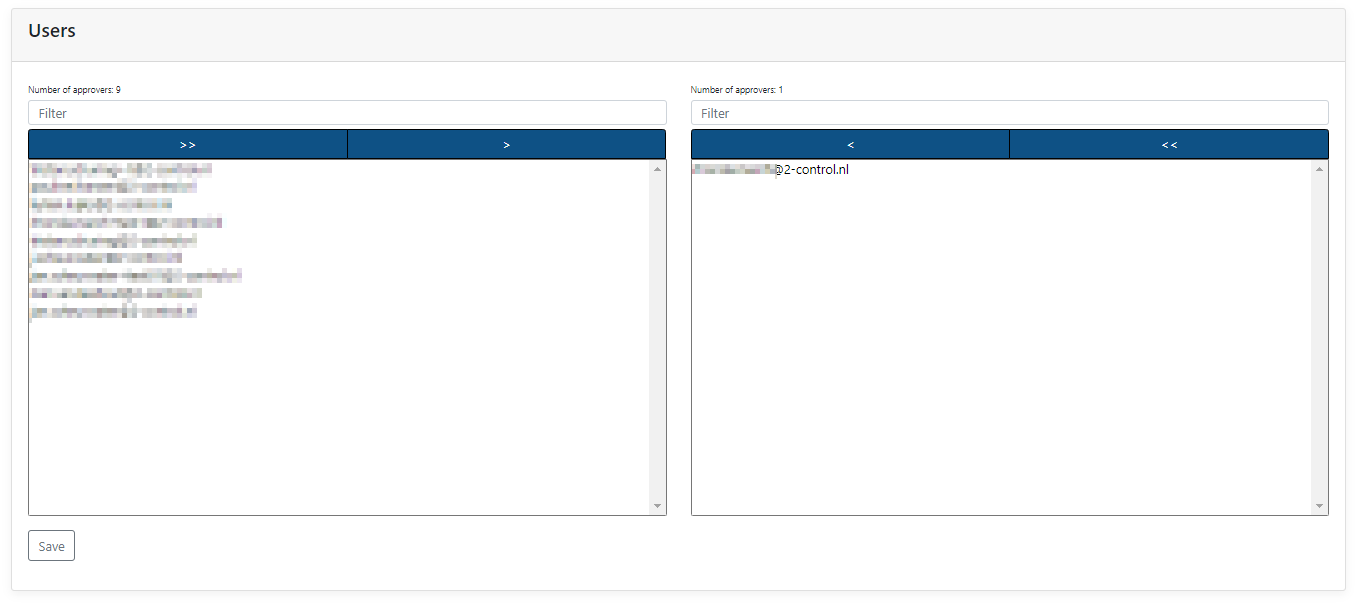
To finish selecting the user(s) for that Group, click on ‘Save’ in that fasttab.
¶ Adding Organization Roles to an Approval Group
When an Approval Group has been made, one or more Organization Roles can be added to that Group by moving them from the left to the right column in the fasttab "Organization Roles".
This can be done by double clicking on a role or by selecting a role and clicking on one of the arrow buttons pointing to the right.
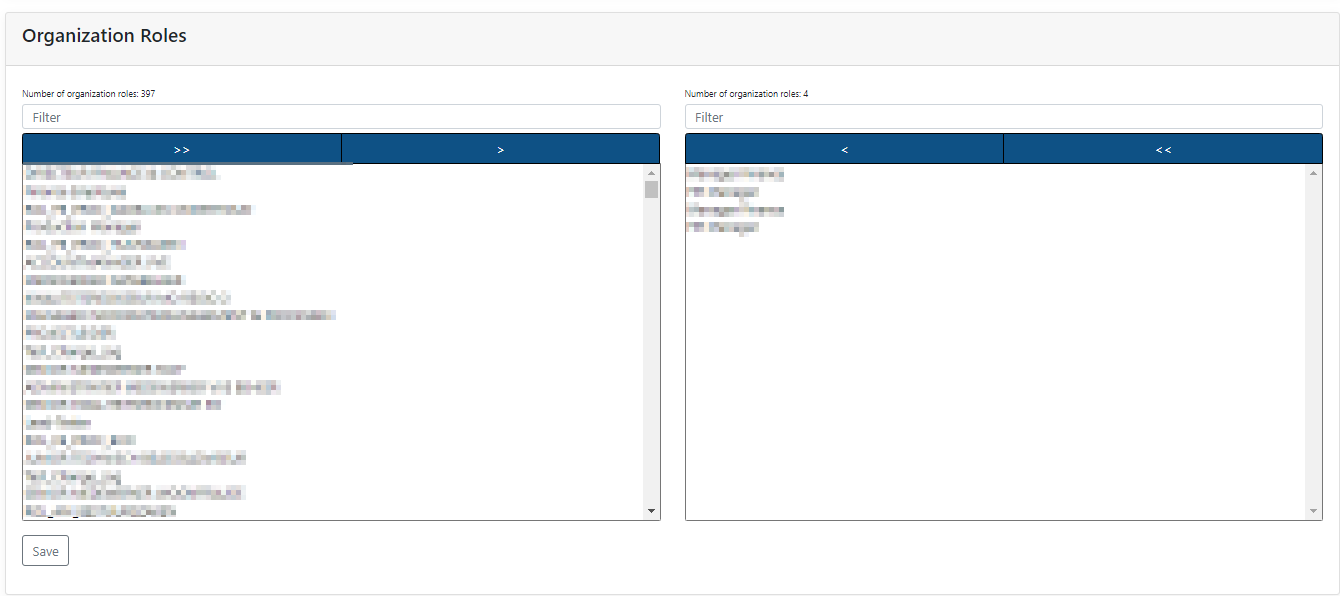
To finish selecting the role(s) for that Group, click on 'Save' in that fasttab.
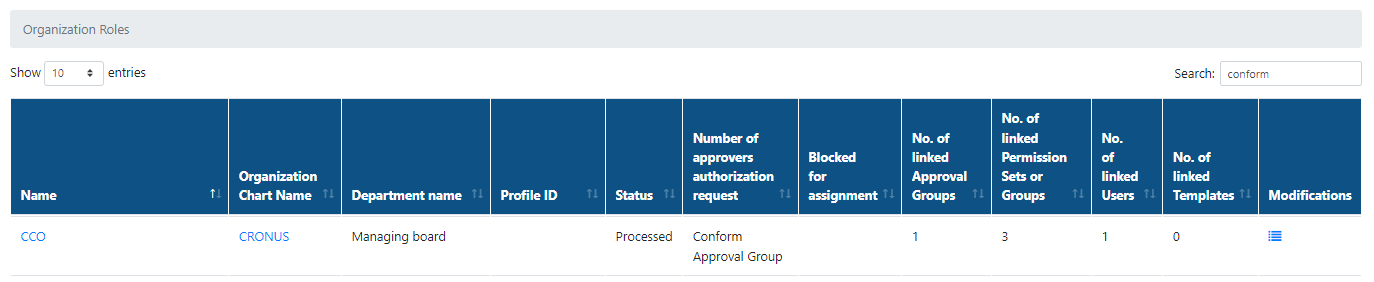
When an Approval Group has been assigned to an Organization Role, the “Number of approvers authorization request” for that Organization Role will be set to “Conform Approval Group” instead of “According to General Setup (Default)” or a set number of approvers.
¶ Setting up Notifications to be received (has to be set up per database connection by the user themselves)
To manage and change the notification settings of the Authorization Box.
Click in the upper right corner on the name of the account and select “Notification Settings”.
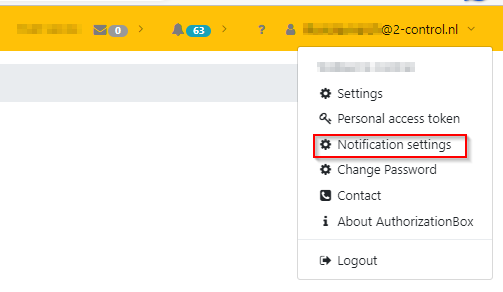
An overview of all notification settings is prompted.
All notification settings are categorized.
The following categories are defined:
- User Management,
- Authorization Framework,
- Monitoring,
- Synchronization,
- Database.
Choose “Yes” or “No” with the dropdown to receive notifications in the Authorization Box and / or to receive a notification email.

'Save & Close' : Saves the preferences and closes the page.
'Cancel' : Cancels the (changed) settings and closes the page.
¶ API
2-Controlware has a Web API and an Authorization Request API to access our data.
The links to access these :
Web API : https://api.2-controlware.com
Authorization Request API : https://api.2-controlware.com/authorizationrequest/
(at the moment we are on V3.0)
The links to the Swagger documentation :
Swagger Web API : https://api.2-controlware.com/swagger/index.html
Swagger Authorization Request API : https://api.2-controlware.com/authorizationrequest/swagger/index.html
Log on to the API with a Username and Password or with a Personal access token.
This user has to be granted a specific Function Profile (API User) to be able to access the API.
When using a Username and Password, go to the Swagger Web API page and use the “POST /api/v{version}/Authenticate/Login".
When using a Personal access token, go to the Swagger Web API page and use the “POST /api/v{version}/Authenticate/AccessToken”.
How to get a Personal access token through the Authorization Box is described below.
¶ Processing of Authorization Requests created by the API.
As part of the Database settings, you can setup how you want to process Authorization Requests that are created by the Authorization Request API.
The available options are:
- None: Don't automatically process a request,
- Use Authorization Box approval settings: Process according to the approval settings of Authorization Box. When approval is being used, an Approval Request is created and the request is processed after approval has been given. Otherwise the request is automatically processed.
- Automatic processing: Always automatically process an Authorization Request and skip the approval settings.
This new database setting is to be used together with a new element in the POST and PATCH requests: "processRequest". When the value for this element is False (default), a request is not automatically processed. When the value is True, a request is processed according to the database setting.
¶ Authorization using Swagger
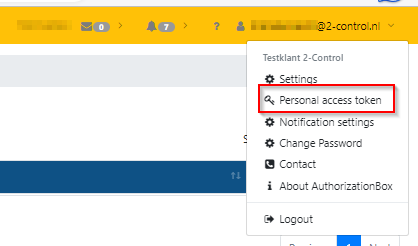
To get access to our API with a Bearer token, log into the Authorization Box and click on the user name in the top right corner.
Select “Personal access token”.
In the following screen click on 'New'.
Fill in the user name and select if this token has to be valid for some period of time or if it doesn't expire.
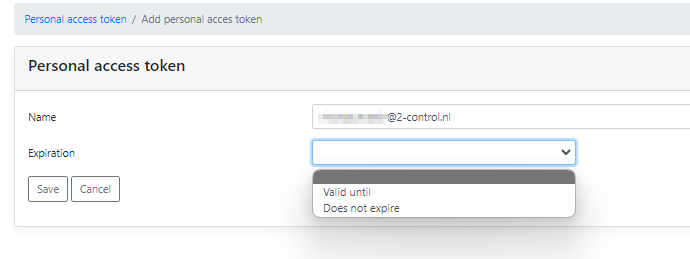
Click on 'Save'.
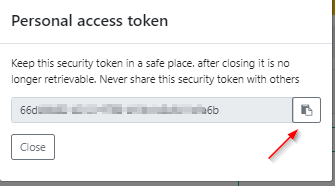
A pop-up appears with the Personal access token.
Copy it by clicking on the ‘Copy’ icon and click 'Close'.
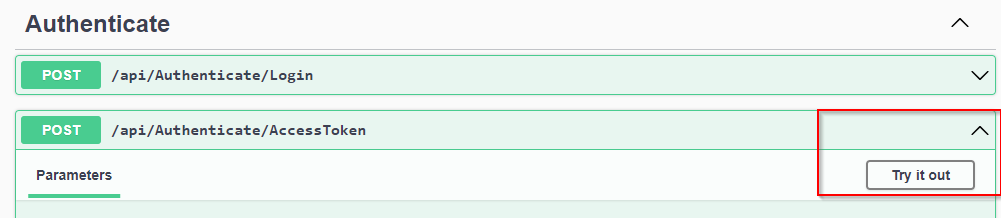
On the Swagger Web API page scroll down to “Authenticate” and choose the “POST /api/v{version}/Authenticate/AccessToken”.
.png)
Click on 'Try it out'.
Replace “string” with the user name (keep the quotation marks)
and replace the number after “token” with the token that has been retrieved from the Authorization Box (keep the quotation marks).
.png)
Click on 'Execute'.
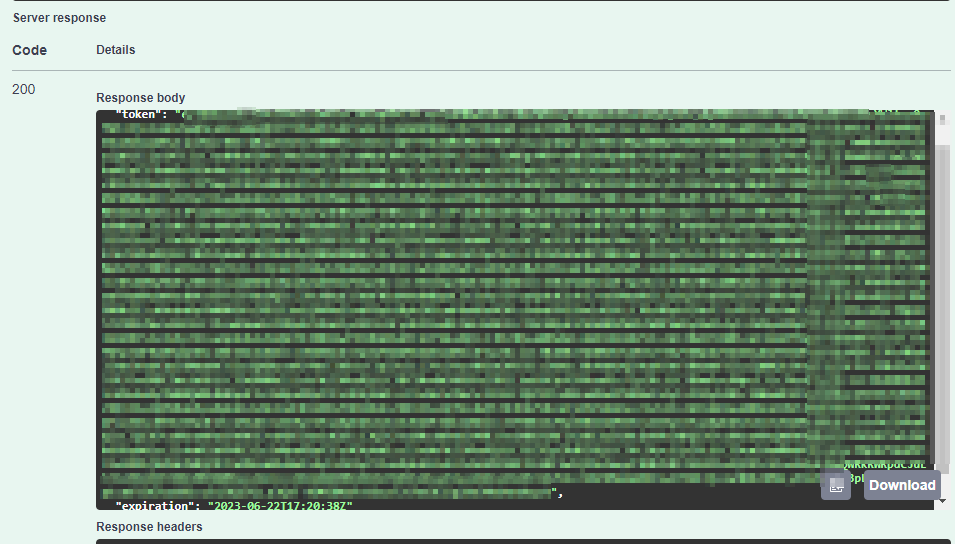
A Server response with Code 200 shows the Bearer token.
Copy this whole token shown in green.
In our sample picture below, the code is hidden but what is between the quotation marks is what is required.
The response also shows on the bottom, when this token will expire
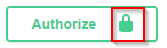
Click on 'Authorize' on the top of the page.
As per description in the pop up, start the Value with “Bearer” and paste the code which was just generated.
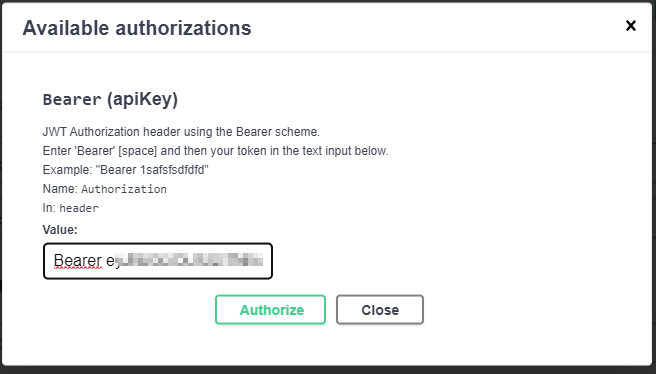
Click on 'Authorize'.
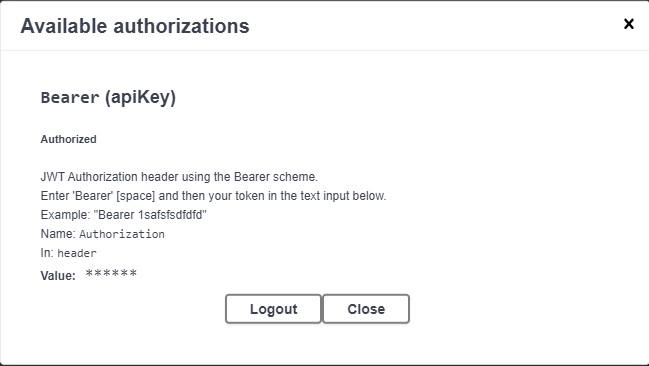
The value will have been changed into ****** .
Choose ‘Logout’ to leave access to our API or ‘Close’ to start using Swagger.
The green “Authorize lock” shows it is locked when ‘Close’ was chosen.
¶ Example of use with Swagger documentation
Use the Swagger documentation to get the number of Organization Roles right from the API by using the “GET /odata/OrgRolesPerUser/$count”.

Click this option open (downward arrow), click on 'Try it out'
The possible response codes are also shown, some with an example response.
Fill in the Parameters, if required for this request, and click on ‘Execute’.
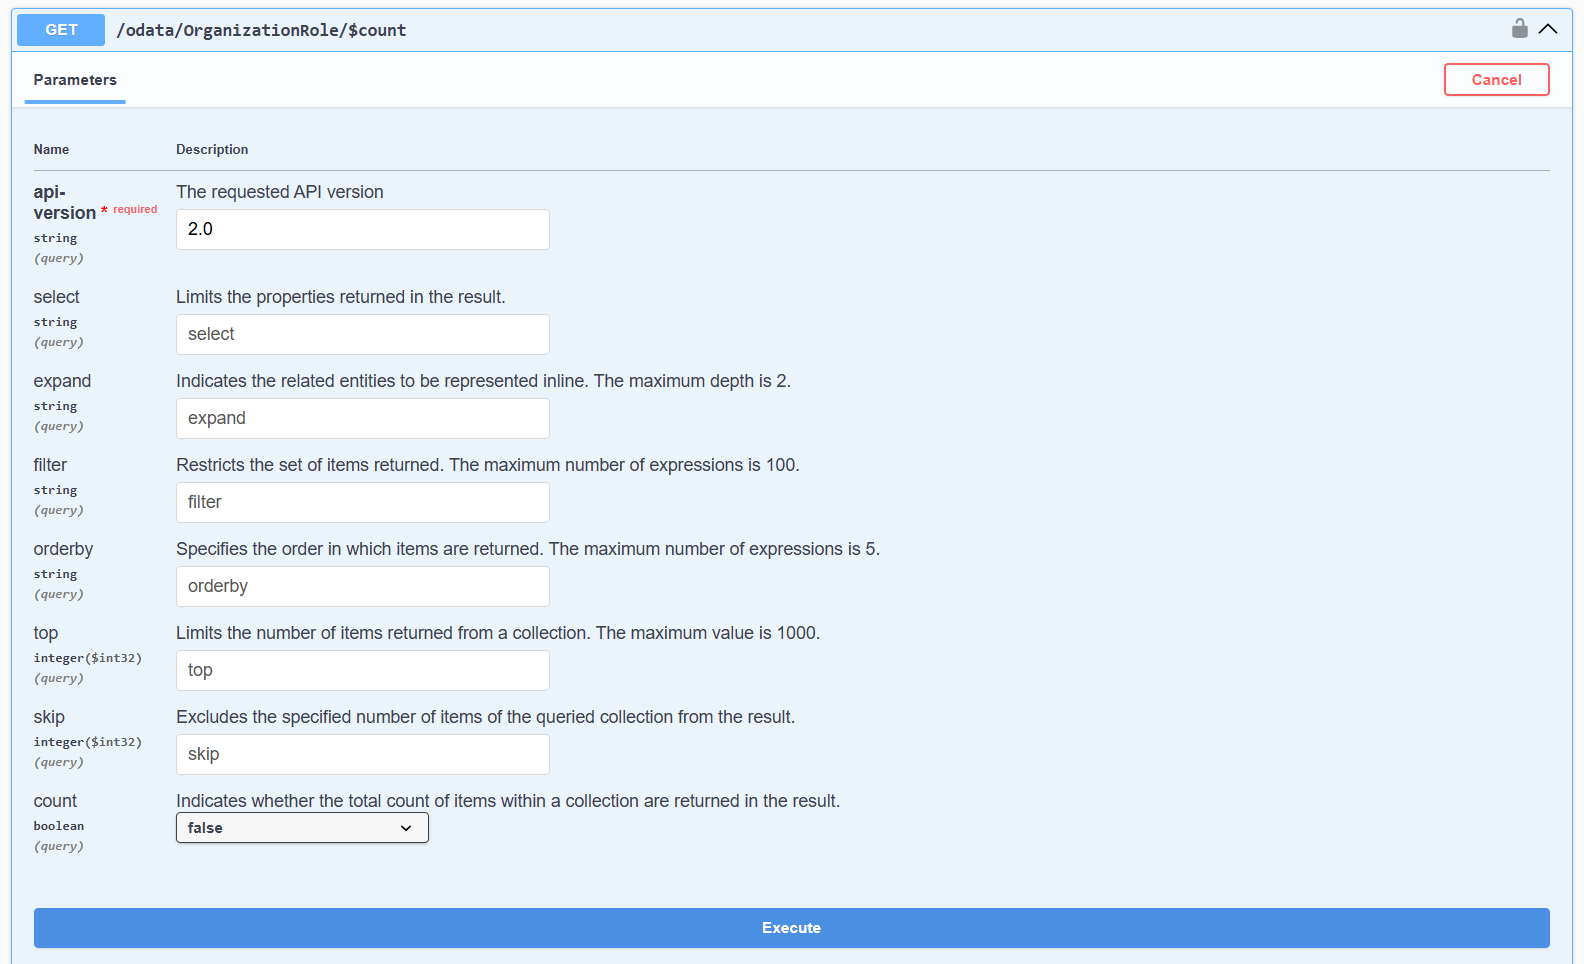
A Server Response should show the result.
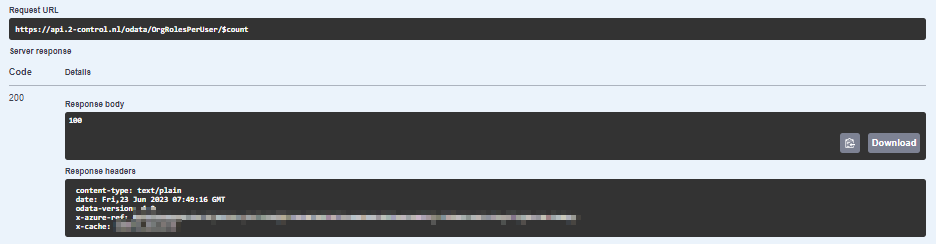
Other possible responses are Code 401 (Unauthorized) or Code 403 (Forbidden). In those cases something is wrong with the token or the rights of the user.