¶ General
This is the installation guide for the Authorization Box.
The Authorization Box communicates with your Dynamics environment via a web service and a secure relay mechanism.
For more details about architecture and security, see Security and Compliance.
To use the Authorization Box, first install two technical components. After that, start setting up your connection.
For the installation guide for the Compliance Apps (Field Security and/or Field Validation), see Getting Started in our separate wiki for our apps.
¶ Technical Installation
To communicate with the Authorization Box, a Dynamics web service and an Authorization Box Multi Connector need to be installed.
It is important that the connection user has the SUPER permission in Business Central as this user has to have permission to assign rights in Business Central.
¶ Dynamics Web Service
¶ System Requirements
For the Cloud version of Microsoft Dynamics 365 Business Central, there are no additional requirements.
For On-Premises installations of Microsoft Dynamics 365 Business Central, the following is required:
- The license needs to be updated with granule Compliance Essentials (70077720). When still using a Dynamics NAV version, the granule Business Essentials (11018410) is required. If software from 2-Controlware is already in use, the granule will be present in the license.
- SOAP Services need to be enabled on the service tier configuration.
- Supported versions: Microsoft Dynamics 365 Business Central (for Dynamics NAV versions: Dynamics NAV 2013 R2 and up).
¶ Installation
To install the required web services, installation of our extension Compliance Essentials is required.
For the Cloud version, install either one of the available Compliance extensions (Field Security, Field Validation or Inventory Reconciliation) and the Compliance Essentials will be automatically installed with those extensions.
For On-Premise installations, download the extension from our web portal and install it manually.
For detailed extension installation instructions, see Getting Started.
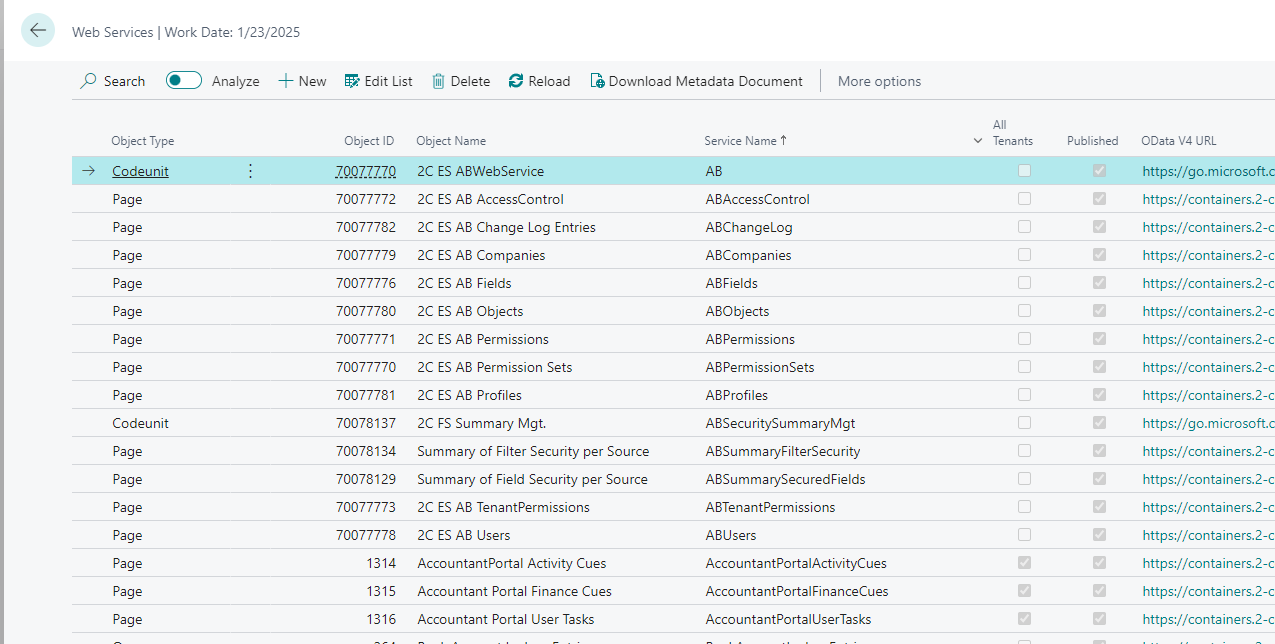
After the extension is installed, the following web services will be available in your environment.
(Codeunit 70077770, Object Name ‘2C ES ABWebService’ with Service Name ‘AB’)
When using a Dynamics NAV version, our 2-Controlware software (.FOB) can be downloaded from our web portal, to install the .FOB file.
Afterwards, manually create the following web service: Codeunit 11112022 ABWebservice.
Make sure the Service Name is “AB”.
¶ Authorization Box Multi Connector
¶ System Requirements
On the server where the connector is being installed, the firewall needs to enable communication between:
- Inbound (internal network) : The Authorization Box Multi Connector and any Business Central service tier to be connected (especially the configured web service ports of the service tier)
- Outbound : The Authorization Box Multi Connector and our Azure Service Bus.
- Azure Relay port settings : Open the firewall's outbound ports as described in the following article https://docs.microsoft.com/en-us/azure/azure-relay/relay-port-settings#wcf-relays.
This article includes a table that describes the required configuration for port values for Azure Relay. - IP/Host whitelisting : Authorization Box is hosted on Azure. As a result, the Authorization Box does not have a fixed IP address, but changes daily or more often.
Therefore, a range of IP addresses must be added in the firewall (if applicable). See: https://blogs.msdn.microsoft.com/servicebus/2017/01/13/azure-wcf-relay-dns-support/.
Test whether the host name: box-sb-prod.servicebus.windows.net can be whitelisted.
If this does not work, the following PowerShell script can be used to find IP addresses to whitelist: https://github.com/Azure/azure-relay-dotnet/blob/master/tools/GetNamespaceInfo.ps1 . This returns a list of all IP addresses associated with our service bus. It is possible that this is a large number of addresses.
- Azure Relay port settings : Open the firewall's outbound ports as described in the following article https://docs.microsoft.com/en-us/azure/azure-relay/relay-port-settings#wcf-relays.
When running Business Central in the Cloud, we can host the connector for you. In that case, skip this step.
For more information about hosting of the connector by 2-Controlware, please contact sales@2-controlware.com .
¶ Installation (video)
This usually is performed by a (partner)consultant.
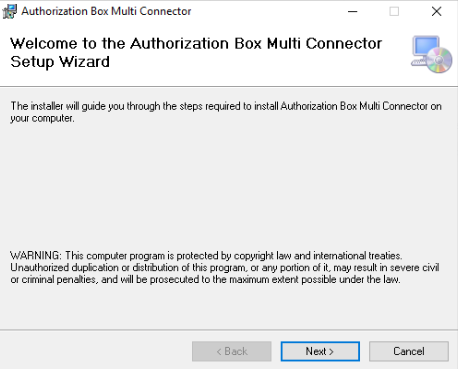
On the server where the connector is being installed, run the installer setup.exe from the zip file authorizationbox-setup.zip.
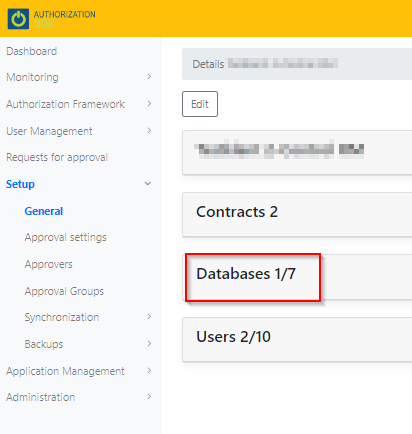
The installer can be downloaded when logged in to the Authorization Box using the menu option Setup=>General.
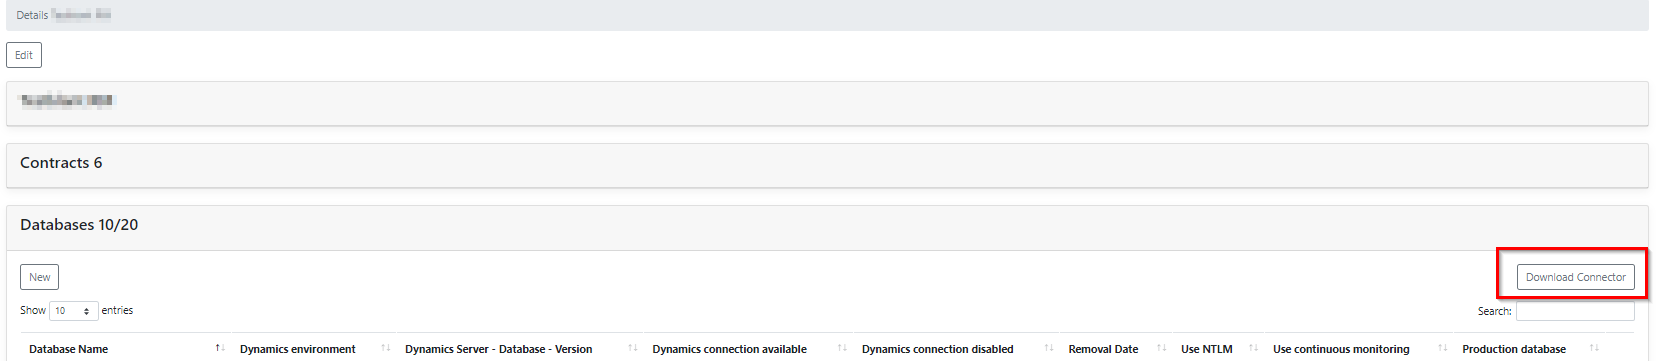
In the fasttab Databases, use the button ‘Download Connector’.
A partner can download the file from our portal.
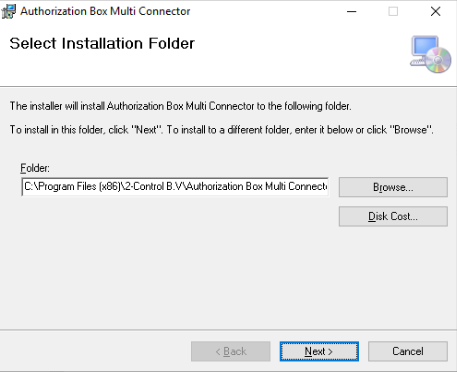
Select a different location for installation if required
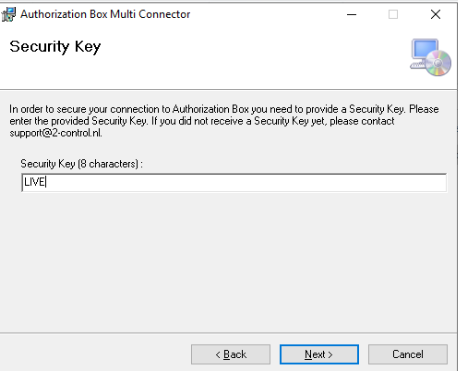
Insert the security key. In case a security key is not known yet, please contact support@2-controlware.com.
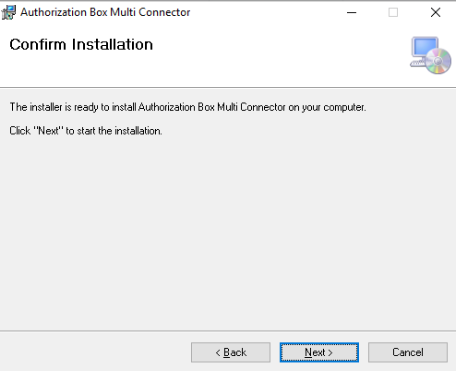
Confirm installation by clicking on Next
After the installation is finished, the following Windows Services are installed:
.png)
Make sure that also the service Authorization Box Multi Connector Update runs.
This service will automatically update the Authorization Box Multi Connector if needed.
Please test if the Dynamics web service can be reached on the server where the connector is installed.
Test this by copying the SOAP URL from the page Web Services in Dynamics from the webservice “AB” (Codeunit 70077770) and paste this in a browser on the server where the Multi Connector is installed.
After authentication a WSDL page should appear.
¶ Configure Business Central
To access the Business Central web service, the following is required:
- A SUPER user
- When using OAuth to authenticate, a valid (consented) Entra Application is required.
OAuth is mandatory for the latest (Cloud) Business Central versions. In case an older version is in use, this step can be skipped.
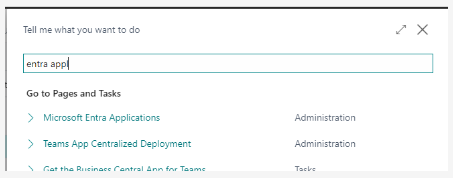
Open the Business Central environment and search for Microsoft Entra Applications (in older versions Azure Active Directory Applications).
Open the application card called “Integration with Authorization Box.”
This application is automatically installed when the extension Compliance Essentials is installed.
If for some reason the application card for Authorization Box can not be found or it got accidentally removed, add the application card manually.
¶ How to create the application card manually
Click on 'New' to add a new Microsoft Entra Application Card and create the card with the following data:
- Client ID = “{54458fab-b778-4677-b5f5-04b3d0fe39a5}”
- Description = Integration with Authorization Box
- State = Enabled
- Contact Information = 2-Control B.V.
- App ID = Select the Compliance Essentials extension.
In case the Compliance Essentials extension can't be found, the Technical Installation above should be completed first.
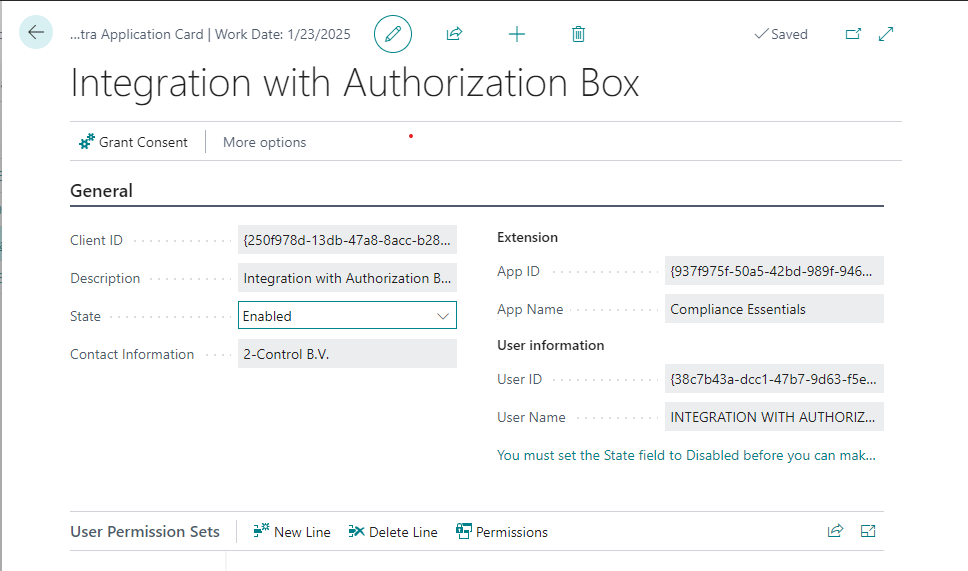
The state of the application must be set to “Enabled”.
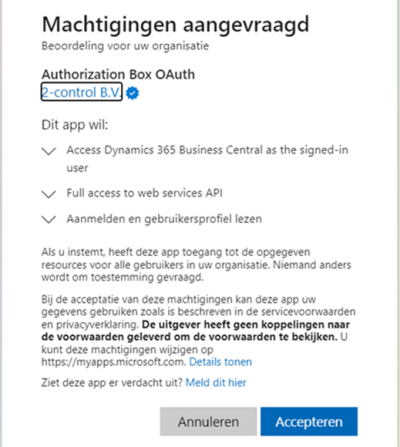
When the OAuth authentication is going to be used, click on the button Grant Consent and follow the wizard to give permission to the Authorization Box OAuth app [ important ! ].
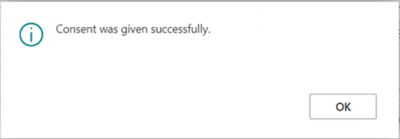
When you have finished the wizard, the message should appear : “Consent was given successfully”.
¶ Configure Authorization Box
When the technical installation and the configuration of Business Central are finished, start configuring the Authorization Box by creating the first database connection.
¶ Create the (first) database connection (available as YouTube video)
A 2-Controlware employee will add the first user in the Authorization Box and this person will receive a welcome mail.
If your company uses Microsoft 365 (with Entra), the user just needs to enter their @company email address.
Go to https://login.2-controlware.com and use your @company email address to log in.
.png)
When an Authorization Box user logs in for the first time, a request to grant permission will pop up.
Click on ‘Accept’ to grant the 2-Controlware Microsoft Entra environment to use the company’s Microsoft Entra account for the login process.
We only use the email address and the display name of this Entra account and the only activity we monitor, are the login and logout actions.
The company’s policies might require the use of the Microsoft Authenticator to approve the login request.
If you don't have Entra, they receive an email with a verification code.
Next, click in the menu on Setup -> General and click on the fasttab "Databases"
- Click on the 'New' button
- Enter the Database name and click on ‘Next’
- Paste the SOAP-URL from the web service in the Connection URL-field (http(s)://<domain>:<port>/<Dynamics service name>/WS/<company>/Codeunit/AB).
This URL can be found in the Dynamics environment in the page Web Services. Search for the web service called “AB” (codeunit 70077770) - Select the Authentication method that is used for Business Central
- E-mail for warnings : enter a valid email address where warnings can be sent to
- Enter the required authentication details for the SUPER user account that will be used for the connection. For details about authenticating with OAuth, see Authentication with OAuth
- In case the authentication protocol uses NTLM, the option “Use NTLM” has to be enabled. In case this is not known, the connection check will validate if NTLM is required.
- Click on the button ‘Database’ and select "Test connection"
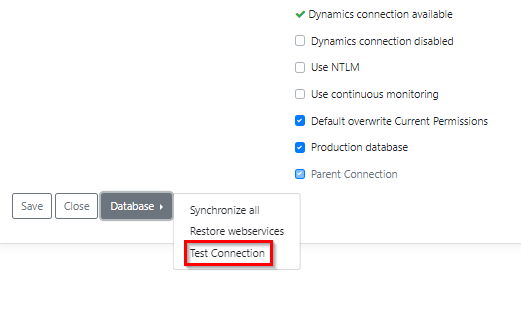
- After a successful test, click on the buttons ‘Save’ and ‘Close’ to leave the database setup
The Authorization Box user that creates the connection will automatically have permissions for the newly created database connection.
For other Authorization Box users, permissions have to be granted for the new connection via their user card.
Access a user card using Setup -> General and click on the fasttab “Users”.
Click on a user name to access their user card.
¶ Processing of Authorization Requests created by the API.
As part of the Database settings, you can setup how you want to process Authorization Requests that are created by the Authorization Request API.
The available options are:
- None: Don't automatically process a request,
- Use Authorization Box approval settings: Process according to the approval settings of Authorization Box. When approval is being used, an Approval Request is created and the request is processed after approval has been given. Otherwise the request is automatically processed.
- Automatic processing: Always automatically process an Authorization Request and skip the approval settings.
This new database setting is to be used together with a new element in the POST and PATCH requests: "processRequest". When the value for this element is False (default), a request is not automatically processed. When the value is True, a request is processed according to the database setting.
¶ Changing the connection URL of the existing connection
When the connection URL of yhe existing database connection should change, it is important to first use ‘Save’ to save this URL.
This action should automatically connect to the database through the new URL.
Using the “Test connection" option after the URL change, will NOT save the new URL for the connection.
¶ Authentication with OAuth
To authenticate with OAuth, there is some configuration required. See Configure Business Central above.
When using OAuth On-Prem authentication, it is necessary to set the ADOpenIdMetadataLocation parameter in the server instance.
(see https://learn.microsoft.com/en-us/dynamics365/business-central/dev-itpro/administration/authenticating-users-with-azure-ad-openid-connect?tabs=singletenant%2Cadmintool#task-4-configure-)
Afterwards, to setup OAuth authentication in the Database Connection, follow these steps whilst setting up the database connection:
.png)
- Select the Authentication Method: OAuth Device Code
- Click on the button ‘Edit’
.png)
- Enter the required fields: Tenant (Domain or Tenant-id) and Scope (by default https://api.businesscentral.dynamics.com/.default)
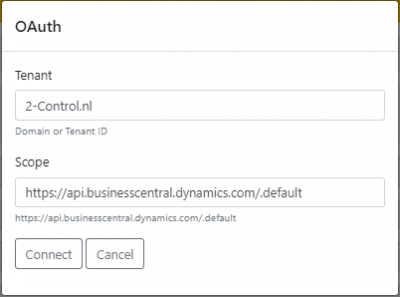
- Click on 'Connect'
- Follow the wizard : Copy the code and click on 'Connect'.
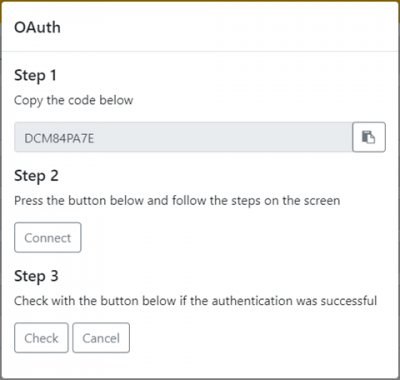
- Paste the code copied in the previous step and click 'Next'
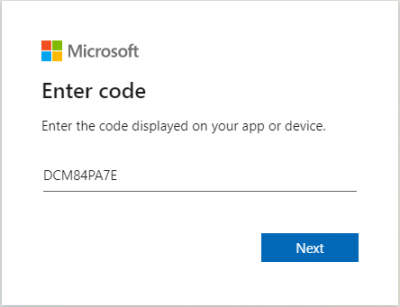
- Sign in with an account that has SUPER rights in the Business Central environment.
- Finish the sign in.
- Return to the form and click on 'Check' (Step 3). A message will appear that a token has been retrieved successfully.
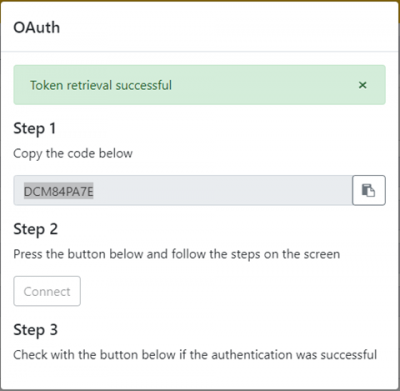
- Close the form, click on the ‘Database’ button and select “Test the connection”. A message will pop up, mentioning the connection has successfully been made.
To maintain the connection, the token must be refreshed periodically. This is automatically handled by Authorization Box.
If a situation occurs that the token is no longer valid, this is usually because the password of the connection-user has changed or that changes have been made to the tenant settings.
In this case an email will be sent mentioning the token has to be refreshed.
The problem can be solved by clicking on the ‘Edit’ button in the General setup of the database and following the above steps again.
¶ Settings Menu
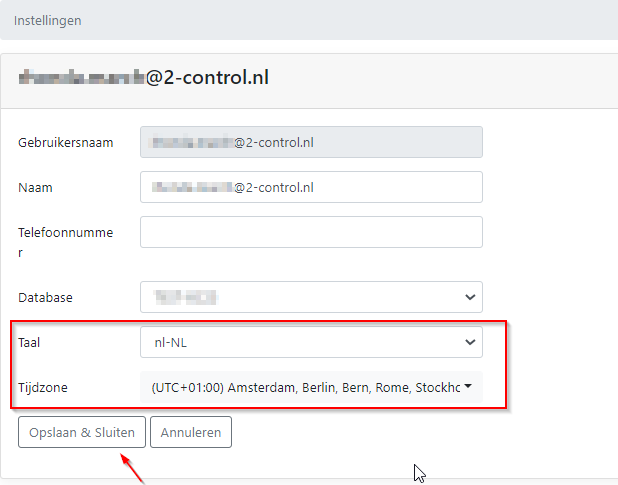
¶ Changing the User (actor) settings of the currently active database
Changing the time zone and language of the currently active database can be set up under the User Settings.
- Open the User settings by clicking on the email address of the user account on top of the page and select “Settings”.
.png)
- Modify the settings as required and confirm with 'Save & Close'
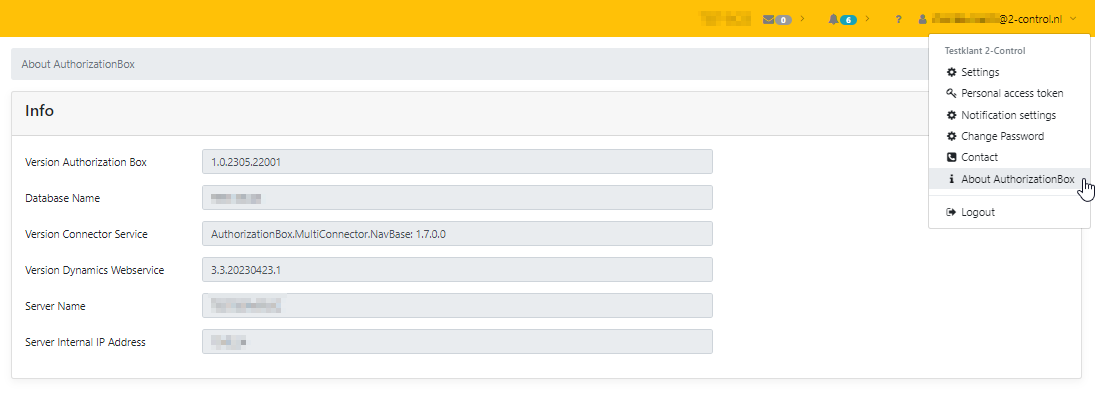
¶ About the Authorization Box
In the Setup menu select the "About the Authorization Box".
This screen shows the Version number, Database name used at time of login, the Server name and the Internal IP address of the Server.
Content of Setup / Administration :
- General setup of Customer settings, Contracts, Databases and Users
- How to add users to the Authorization Box and how to set up Multifactor Authentication
- Set up Approval settings
- Set up Notifications
- Architecture of the Authorization Box on Azure
- Using the API
- Overwrite current permissions in Business Central with the permissions in the Authorization Box